How do I create related assets?
Related Assets are Assets that have some sort of relationship with the current Asset.
For example a Video may have a related Shot-list document or an Image might have a related Talent Release agreement, etc).

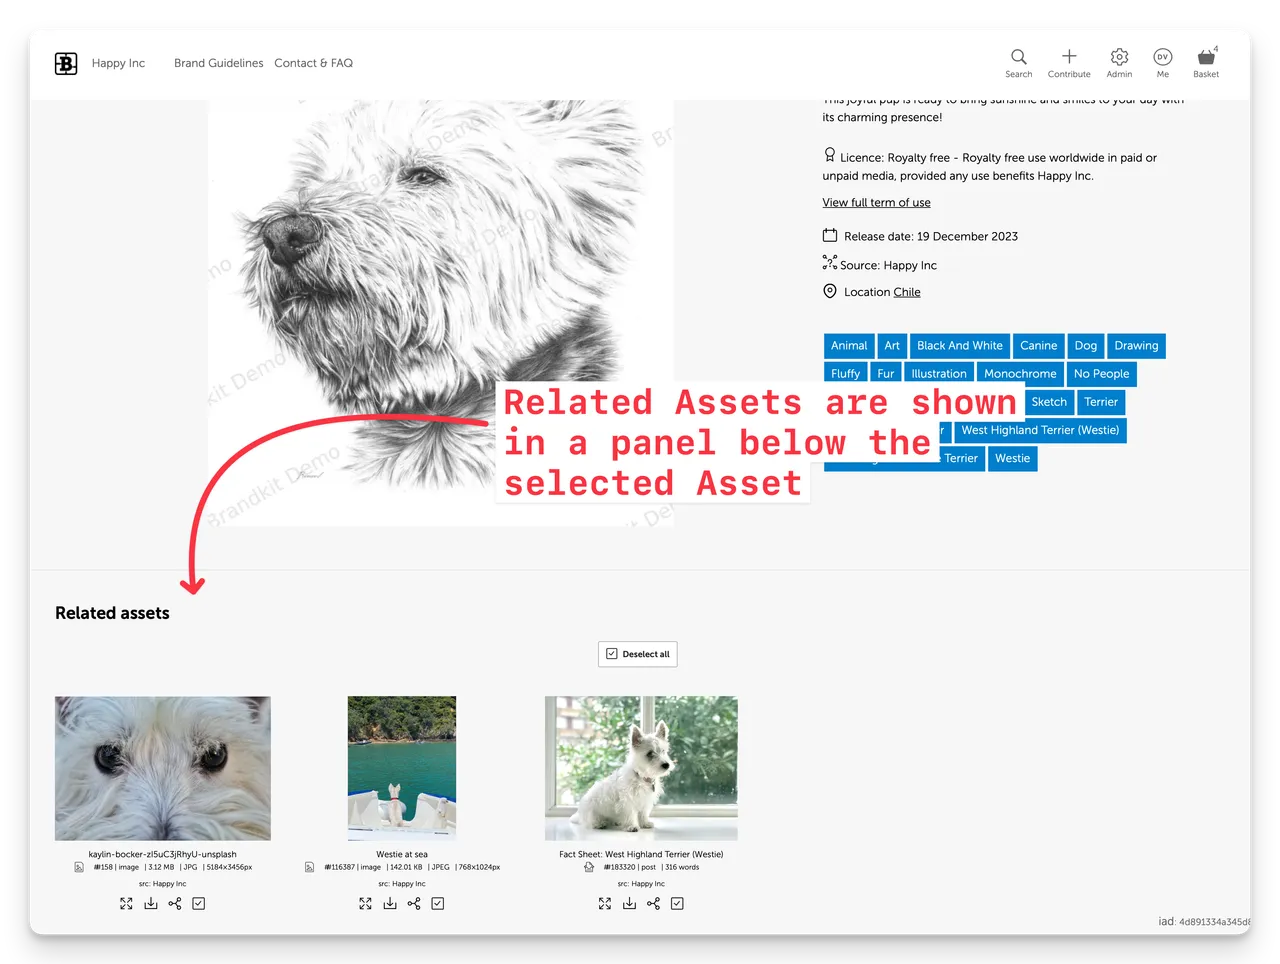
(Screenshot of an Asset Page showing a Related Assets panel)
An Asset can have multiple Related Assets, and the relationships are two-way. That is once established you can find the relationship via any of the Assets in the relationship.
To add Related Assets
There are two methods to add relationships between Assets in Brandkit 2.
Method 1:
Use the Basket to create multiple relationships between all selected assets (e.g. a Talent Release Form and several Photos). Each Asset will have a relationship with all the other Assets, and each related Asset will have multiple relationships to all the other selected Assets.
- Upload, edit and approve your model release or talent release forms (usually as PDF files). Also you generally will put these in a Vault that only Admins can access (unless you want end users to be able to download a copy).
- Select all the Assets (Talent Release Form and Photos) to relate so they are in the Basket.
- In the Basket, once you have the Release Form and the Related Images in the Basket, from the Edit menu select Batch relate.
- Then confirm by clicking OK.
- This will add a relationship between all the Assets to all the other Assets
Method 2:
Create a relationship between one original Asset and one or more Assets (e.g. a Talent Release Form and several Photos). The original Asset will have a relationship to multiple Assets, but each of the related Assets will only be related to the Original Asset.
- Upload, edit and approve your model release or talent release forms (usually as PDF files). Also you generally will put these in a Vault that only Admins can access (unless you want end users to be able to download a copy).
- Open the Release Form’s Asset page in Admin.
- Scroll down to the Related Assets section.
- Click the Add related asset button/link.
- Search for and select each Asset to be Related (you can easily remove again if needed).
- Close the Search modal.
- Review. The related assets will be displayed ion the Related Assets section.
- Check the relationship is two way by clicking on it’s Asset name (in the Related Assets panel), to navigate to the related asset and you will see the reverse relationship also (in that Asset’s Related Assets panel.
Related Assets in Portal
Once an Asset relationship exists, (depending on the design of your Portal), related Assets are shown below the main/parent Asset on the Asset’s page.
Note: the Asset where you add the relationship is know as the Parent asset and the asset you select as the Related Asset is the Child of the relationship. We will also add automatically a reverse relationship from the Child to the Parent.
Note (Advanced): When exporting Asset Metadata for batch editing, the Related Assets column is populated with the unique Asset ID of the child assets. However the Child Asset(s) do not show the reverse Parent Asset ID. This is simply to simplify the manual batch editing of Related Assets. You just need to insert the unique Asset ID of the child assets in the parent Asset’s Related Assets column in the csv(spreadsheet). You don’t need to add the Parent Asset’s ID into the Child Asset’s row.
~ end ~
How do I create related assets?
Adding Relationships between assets (Advanced)


