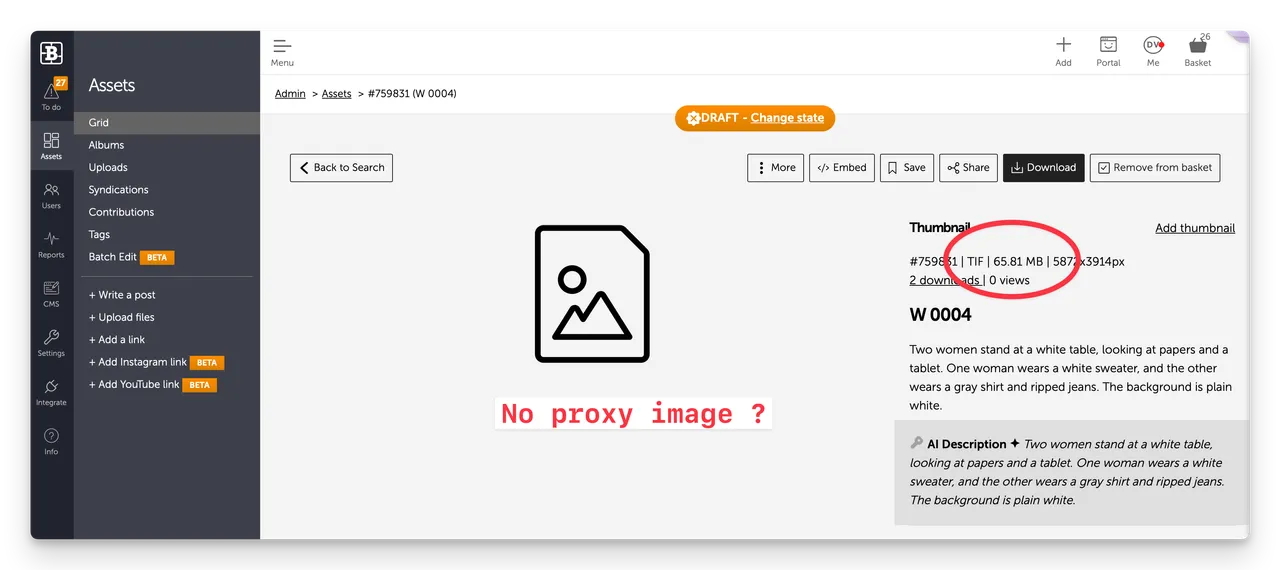
Q: Why are my Tif files not generating a proxy image?
A customer asks:
"I uploaded some images but the preview isn't working. They are .tif files - is this a supported format?"
Yes - Tif/Tiff files are supported on Brandkit. However .tif files are a file format that is quite inefficient when processing to a web optimised image format - and uses considerable server memory.
This means sometimes when you upload .tif files there is no proxy image (thumbnail or preview image) generated for you. Mileage varies as there are many variables at play.
We recommend you limit your .tif files if possible to under 50MB each.
- Any Tif file under 50mb should auto-generate proxy images
- Any Tif file over 50mb may not auto-generate a proxy images
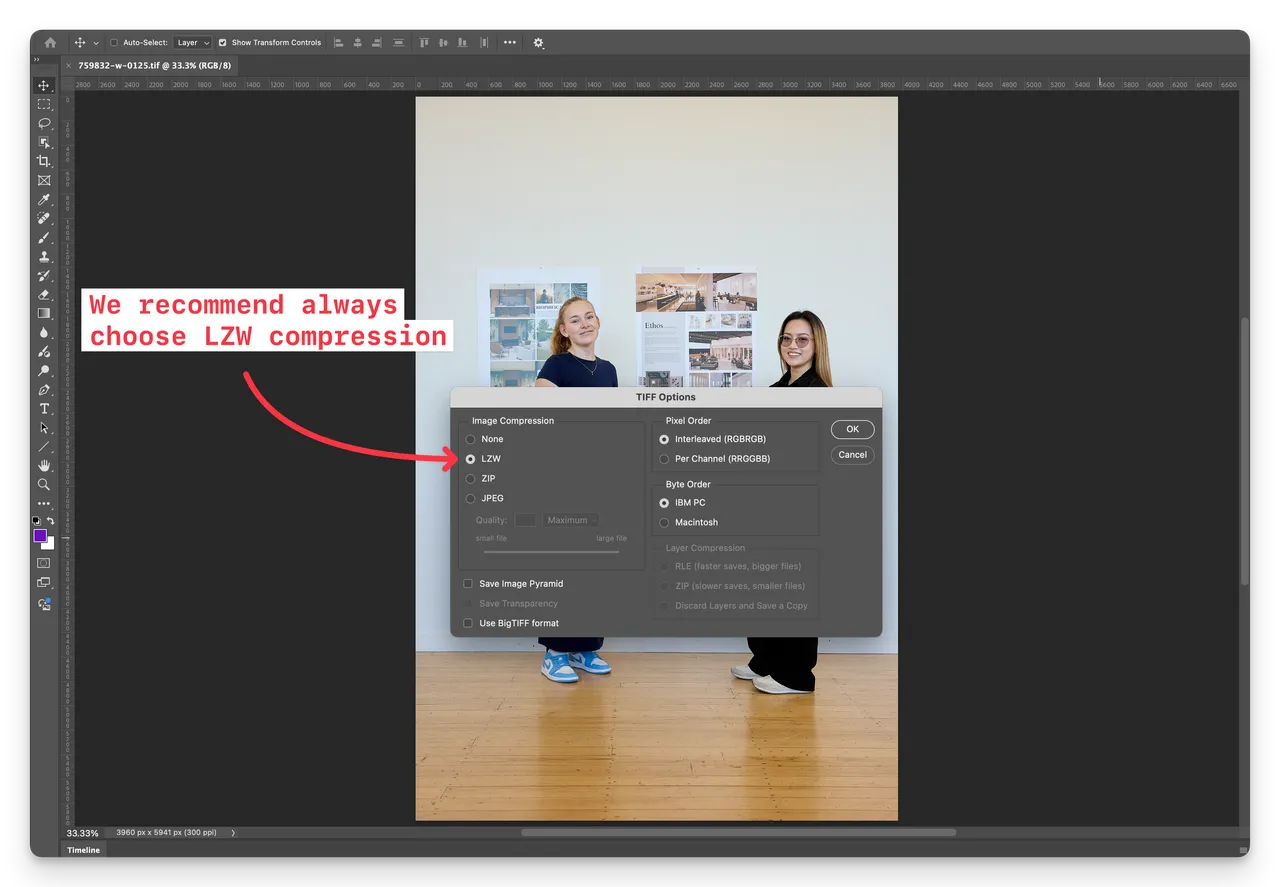
Reduce Tif files sizes with LZW compression
We recommend that Tif/Tiff files should ALWAYS be first saved with LZW (lossless) compression. This typically reduces the files size considerably with zero loss of pixels or quality.
This is easily accomplished in Photoshop by re saving as a Tif with the LZW compression option selected.
- Open the image in Photoshop
- Save as a copy (I usually append "-lzw" to the original filename)
- Select LZW compression in the save dialogue
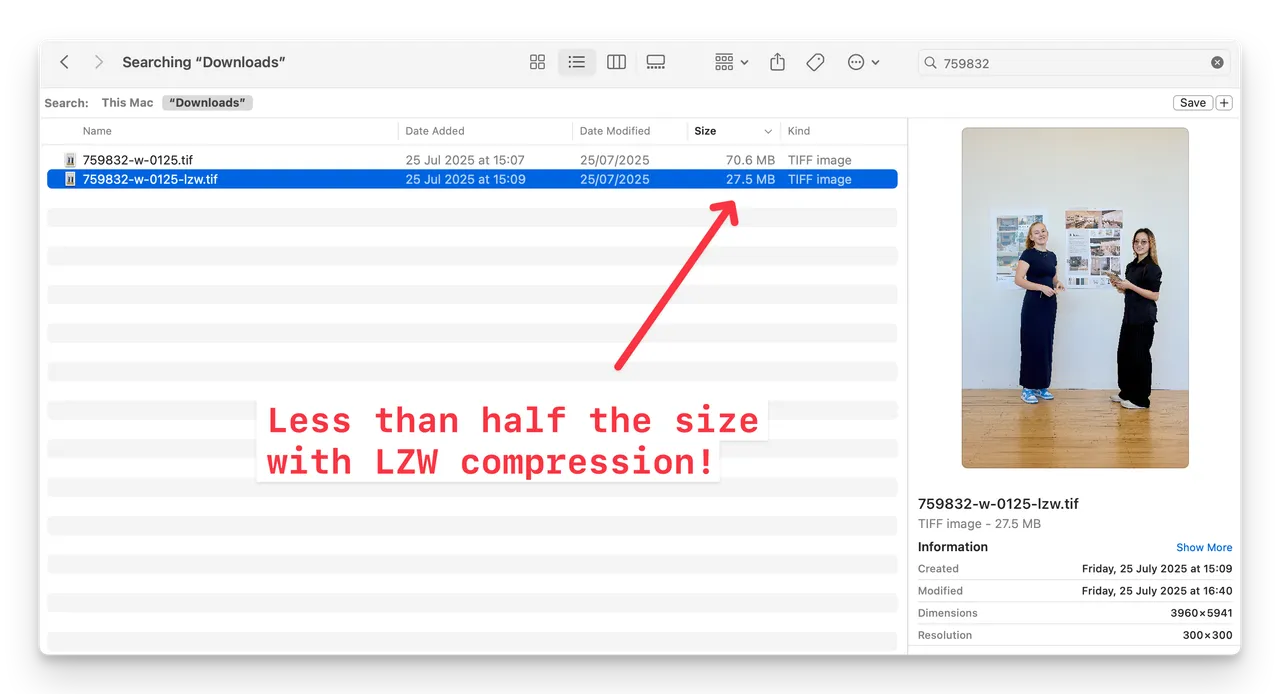
We often see files size halved, and as a bonus this reduces your storage and usage costs.
Work around for larger Tifs
While Brandkit may not generate proxy images for Tif files over 50mb, you can still upload these larger tif files.
You can then upload your own proxy images (thumbnail and preview) directly to the Asset using the Upload custom thumbnail, and Upload custom preview actions under the More... menu in the Asset page of each Asset.
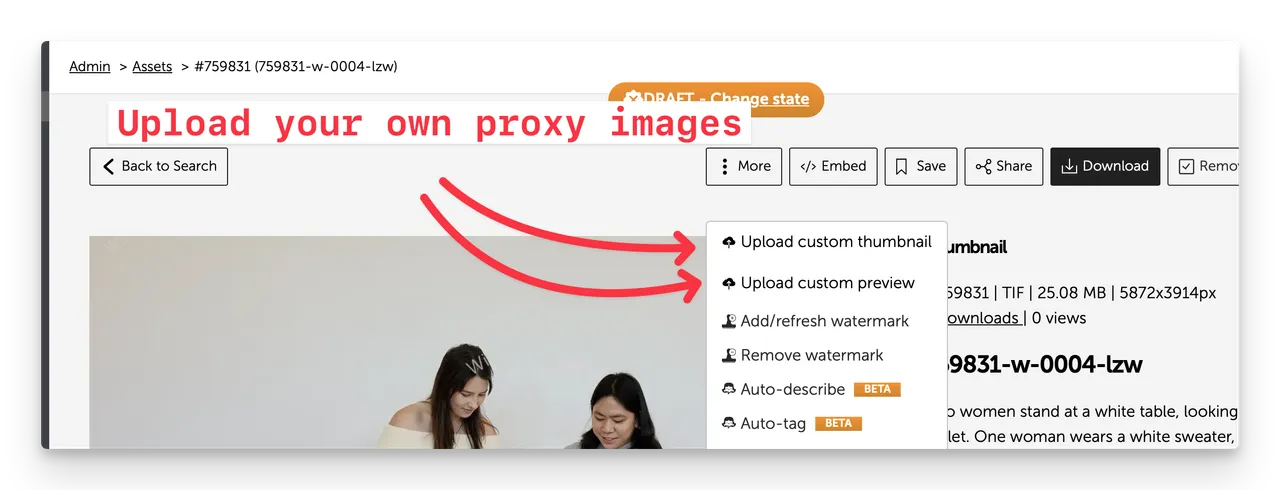
- First create your own proxy image in Photoshop or similar (image should be an RGB JPG, PNG or WebP file at 1280px on it's longest side.
- Navigate to the Asset's Asset page in the Admin interface
- Click the More menu and then from the dropdown upload your thumbnail and preview. You can use the same 1280px proxy image you generated in Photoshop - but you have to upload twice.
You should now see a Preview image and a Thumbnail in the assets grid for this Asset.
Happy branding :)
Q: Why are my Tif files not generating a proxy image?
Sometimes my Tif files don't have thumbnail or preview images. Tif files are supported but we explains the limits for Tif files and the work-arounds.