New: Create digital Brand Guidelines using the new WYSIWYG editor
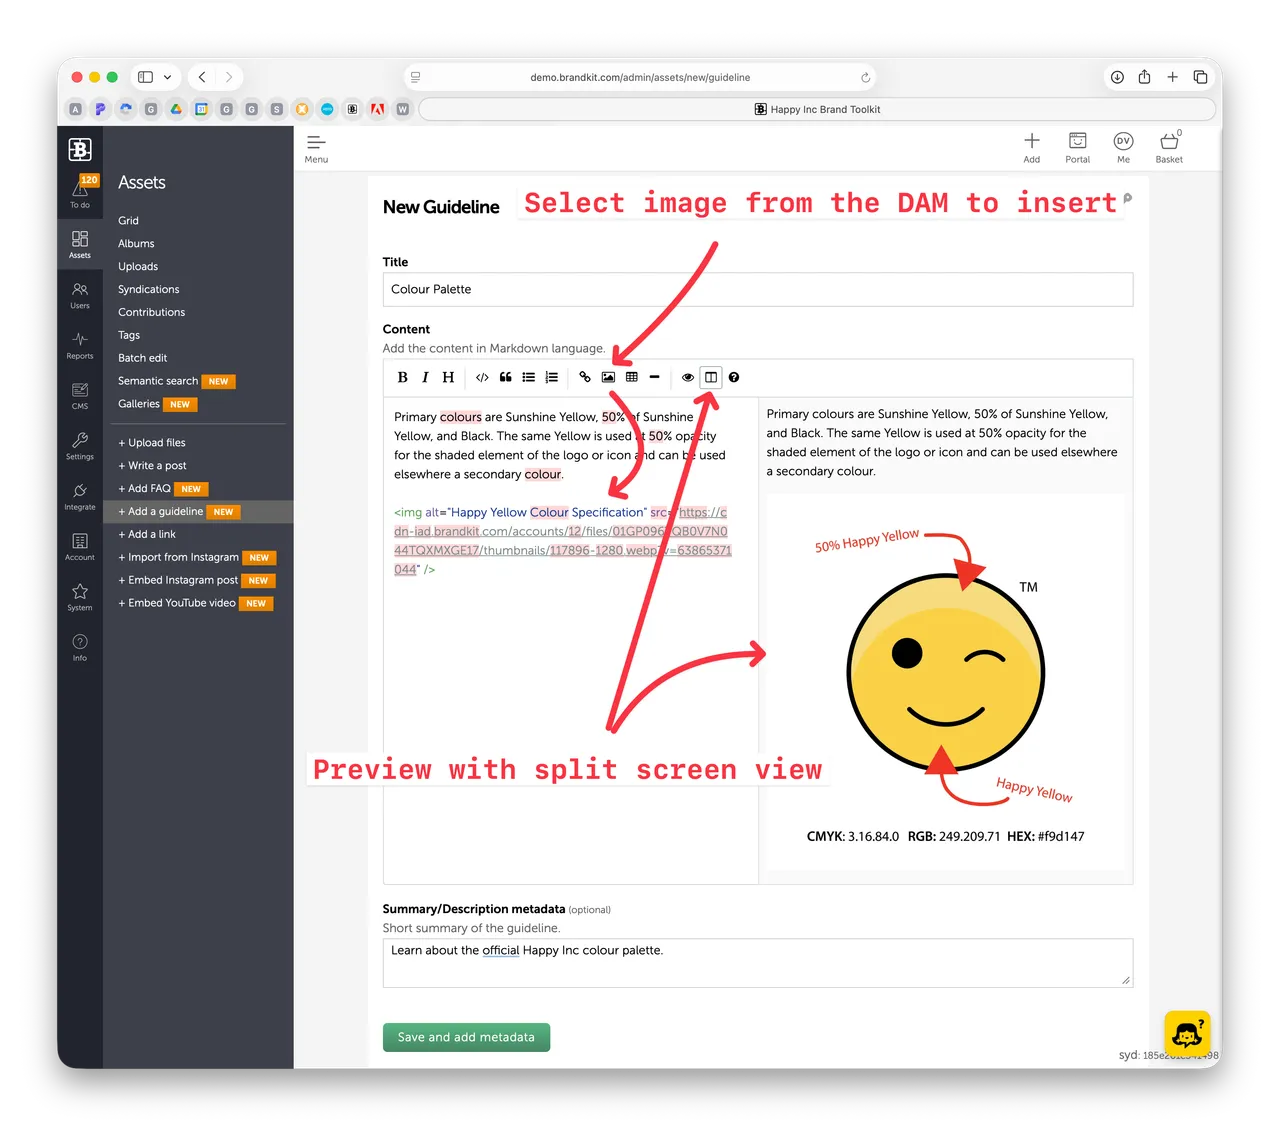
You can now write digital brand guidelines in Brandkit using a new dedicated Guidelines creation workflow —that offers a WYSIWYG/Markdown editor (no HTML skills needed), easy image insertion, and new 'Guidelines' Asset Type.
Then use our Guidelines Smart Section in the CMS page editor to organise those guidelines in a document like structure on the page.
This new way of producing Brand Guidelines essentially atomizes the traditional monolithic document into separate individual rules or guidelines. Then those individual guidelines are assembled into a single web page - akin to a document - but with several advantages.
Advantages over traditional approaches
- Single source of truth for your guidelines
- No more potentially out-of-date copies of PDF or printed documents out in the world.
- No more sending out new version updates
- No more printing costs
- Lower designer/agency costs typically
- Editable in real-time
- Always up to date
- Individual guides are search-able - saving time.
How to create a Guideline
In Admin
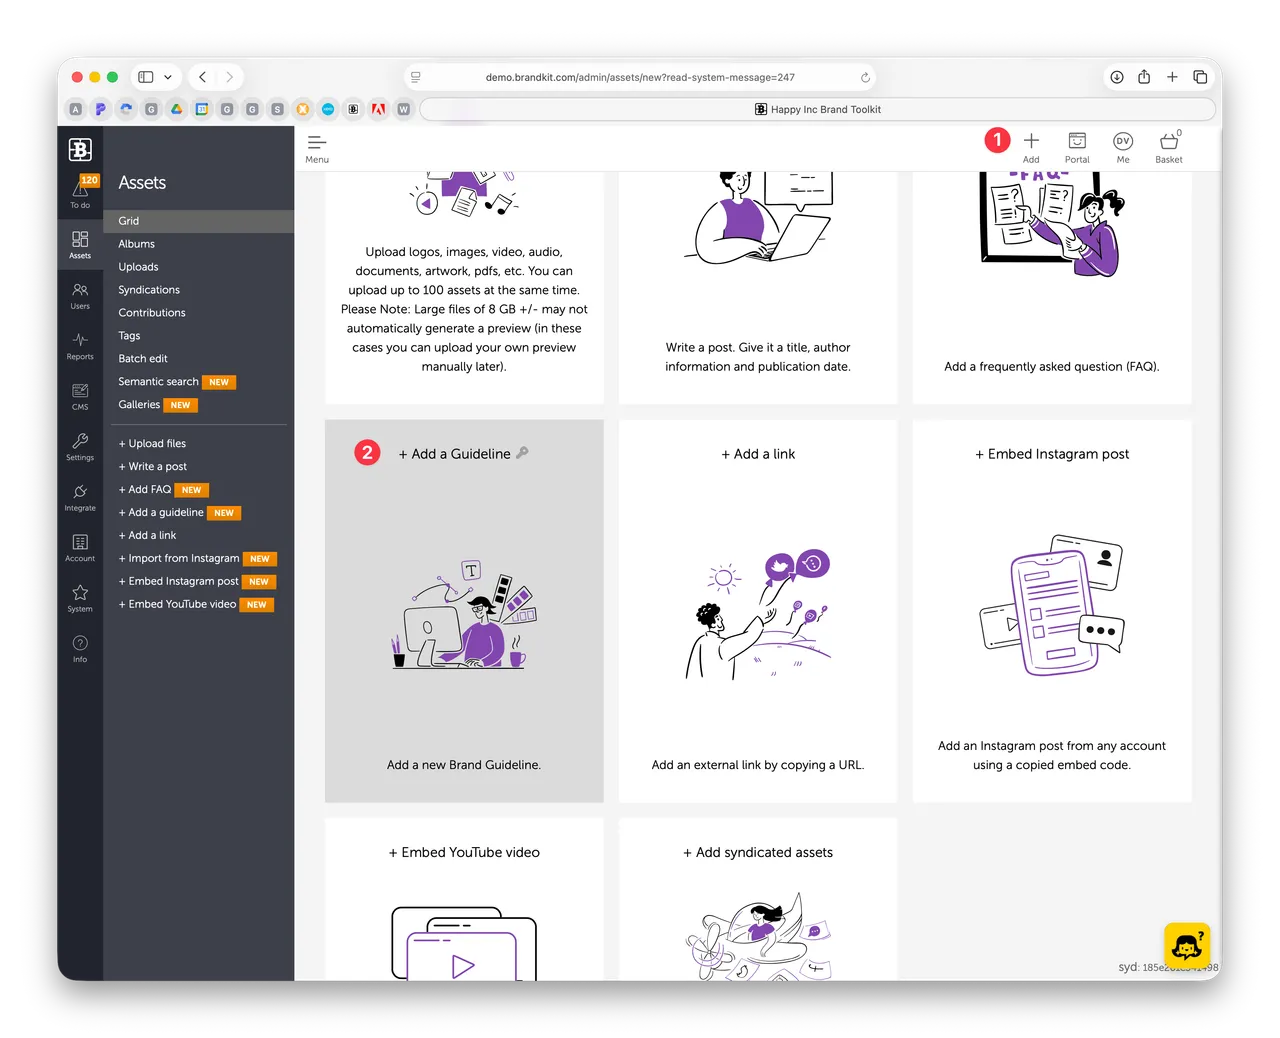
- Click the + Add button (top right)
- Select the Guidelines option/workflow
- Enter the title, body, and summary
- Click Save and add metadata
- Add metadata, such as Tags, change the vault if needed, etc. (Guidelines many of the same attributes as other Asset types).
- Once you are happy - Approve the Guidelines Asset to publish. Remembering that a Draft Asset won't appear in the Portal
How to assemble guidelines and publish a Brand Guidelines page in your Brandkit
Create a new page
First we need to create a Brand Guidelines page in the CMS.
- In Admin
- Click CMS on main menu (left)
- Click Portal
- Click + New Page
- Name the page brand-guidelines (or similar)
- Add a section - select the Guidelines section type
- Give the section an ID name - such as 'guides'
- Optionally give the section a class name or names for CSS targeting
- Select an Album. Default is No Album - meaning all approved Guidelines, but you can organise your Guidelines into albums/collections if you prefer (e.g. Corporate Identity, Social Media Guidelines, etc)
- Select a Layout option - Collapse, Columns or List.
- Choose a sort order for your Guidelines
- Choose visibility options
- Save
- Preview and edit as necessary.
All your approved (aka Published) individual Guidelines are automatically included in the Smart Section (provided the default No Album option is selected).
Adding a Brand Guidelines menu item
You may also want to add a Brand Guideline menu item in the main navbar to wire up th your new Brand Guidelines page. You can add this in the Portal Layout via the CMS using standard HTML
e.g. add a line to the navbar layout along the lines of:
<a href="/brand-guidelines" title="See our Brand Guidelines">Brand Guidelines</a>
Tip: You don't necessarily need a custom page for your Brabd Guidelines if you don't want to. You can just link your menu item to a search for the Asset Type: Guideline
e.g.
subdomain.brandkit.com/?type=guideline
Making changes
Want to Edit an individual Guideline - just navigate to the Guideline in Admin > Assets > and click Edit.
Want to edit the order of Guidelines, or the Brand Guidelines page style, find the page in the CMS and edit page.
Want to remove an individual guideline -just Archive it or Unapprove it.
Like a normal Asset in other ways
Guidelines have tags and and respect Vault visibility permissions like any other Asset. So if you have individual Guidelines that should only be visible to your Staff for instance, just add the individual Guideline to a Vault that only your Staff can see.
Setup Auto Attachment
Use Brandkit's Attachment feature to attach individual Guidelines or all of your Guidelines assets to downloadable files (e.g., logo artwork) so that the relevant Guidelines travel with any download or share of that logo artwork file automatically.
One of the real benefits of Atomised Brand Guidelines is that you can attach, say, just the clear-space, colour, and min size Guidelines to a logo artwork download - rather than attaching everything in the Brand Guidelines (e.g. tone-of-voice is probably unnecessary to accompany logo artwork) to the file.
Notify users about changes
Because individual guidelines are now Assets, you can now easily notify users about changes or updates to your individual guidelines.
For example: Maybe it was just a colour change - so no need a new version to send the whole Guidelines - just share the Colour Palette Guideline on it's own.
No need to distribute a copy of your whole Brand Guidelines document again - just let users know there is an update and they'll get a link to see the changes to the individual guidelines directly in your Brandkit.
Just select the individual guideline (or multiple guidelines) and then select the Share button.
Then select the Share option (rather than Transfer) and then select the users you want to send it to. Easy!
Enjoy :)
New: Create digital Brand Guidelines using the new WYSIWYG editor
You can now write digital brand guidelines in Brandkit using the new dedicated Guidelines creation workflow. Then use our Guidelines Smart Section in the CMS page editor to organise those guidelines in a document like structure on the page - to create digital brand guidelines.