OM3.2 Assets > Collections (Albums)
Overview
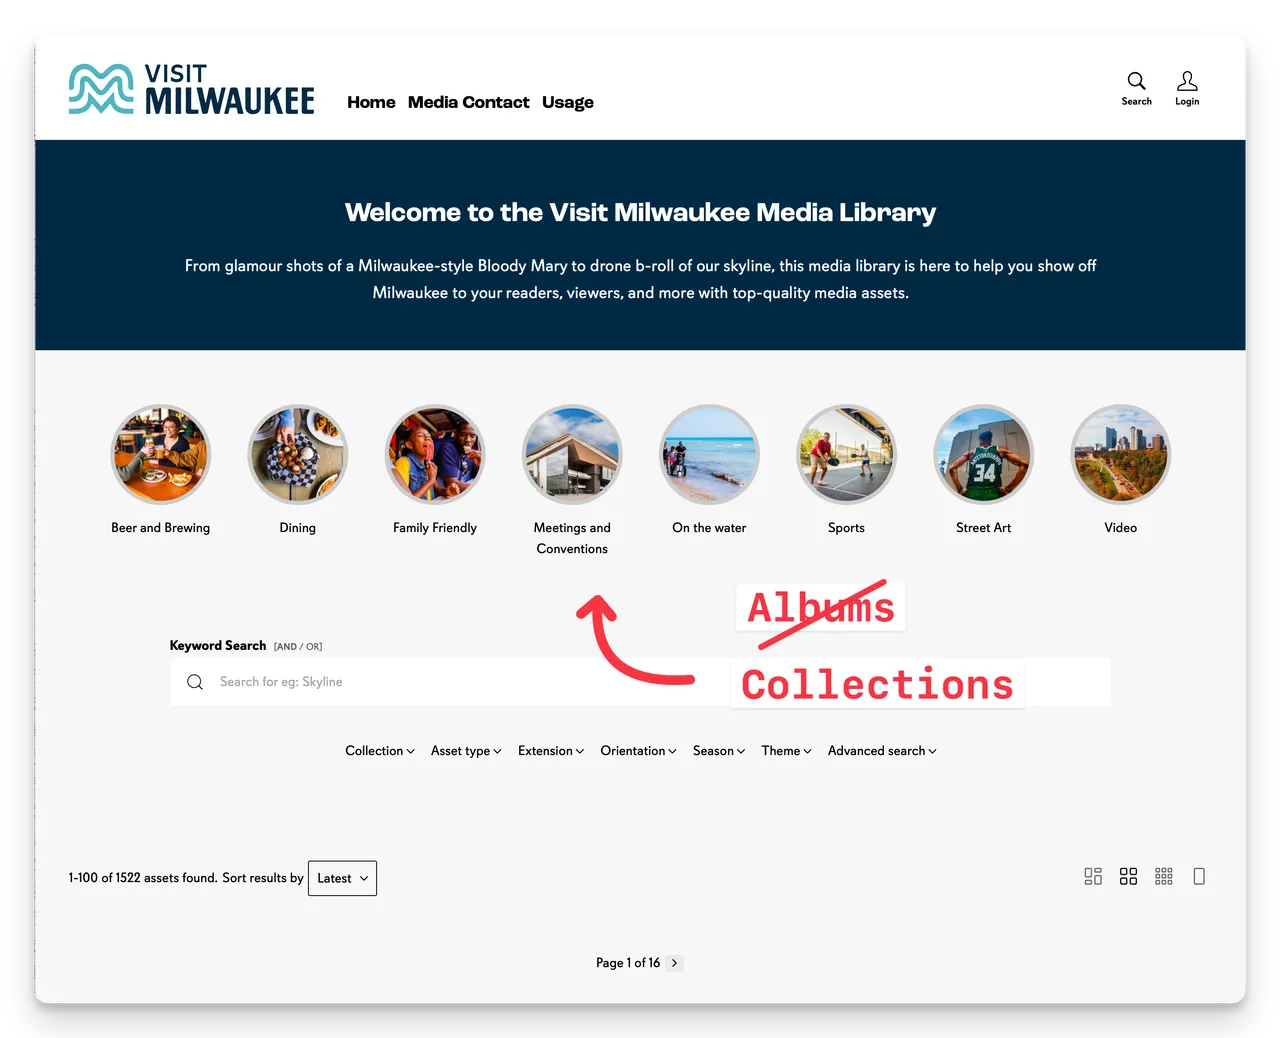
Collections (previoulsy called Albums) are an important way to organise assets into browsable collections. Think of them as folders, but more flexible — an asset can appear in multiple collections, and collections automatically update based on the saved search query (if query based) or you add new Assets to collections based on explicit selections.
Go to Admin > Assets > Collections to manage them.
Creating a Collection (Album)
- Navigate to Admin > Assets > Collections
- Click + New Collection (top right of the Collections view).
- Enter a name and optional description.
- Set a Search Query
- Select an Image from the DAM for the Collection Cover.
- Select Approved to publish
- Save.
Search Query based Collections
Collections are typically based on a saved Search Query.
Assets are added to Collections automatically based on the saved Search Query (e.g. Al assets tagged: Waterfall)
To add a new Asset to the Collection just upload or create an Asset and edit the metadata or tags so it meets the Search Query parameters for the Collection (e.g. add the tag: Waterfall)
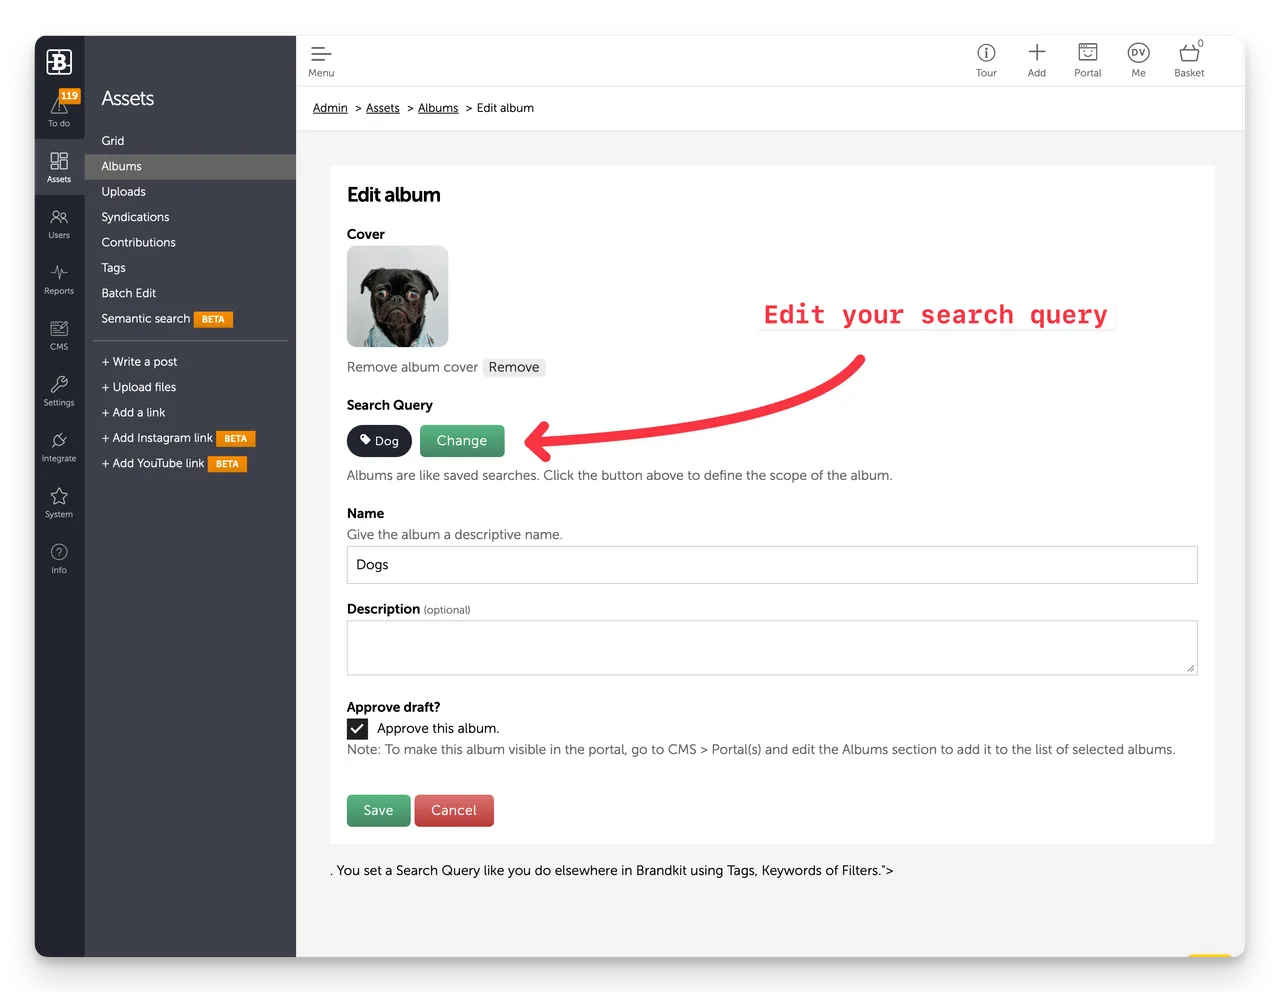
e.g. if the Search Query is set to find Assets tagged with "Dog", just upload a new image and tag it Dog (and Approve it to publish). Because the Tag matches the Collection's Search Query the new image will be shown in the Album.
You can also:
- Edit — change name, description, search query, collection cover, or approval state.
- Delete — remove the collection (assets are not deleted, only unlinked)
Selected Assets based Collections
Collections can also be based on explicitly selected Assets.
Assets are added manually to Collections by explicitly selecting them.
To add a new Asset to the Collection edit the Collection and select Assets from the Asset library.
You can also:
- Add — Assets to a Collection from the Basket via the Save button
- Edit — change name, description, collection cover, or approval state.
- Delete — remove the collection (assets are not deleted, only unlinked)
Collections in Portal
Collections by default are displayed in the standard Portal design layouts on the home page - but for Pro and Enterprise Edition accounts Collections may appear elsewhere.
Settings
- You can set Collections to appear automatically in the Portal when approved (all editions). This is the default setting for new accounts. You'll find this setting in Settings > Collections.
- When you have access to the CMS features (Pro and Enterprise editions) you can selectively show or hide and re-order Collections in the CMS page editor for any CMS page where the Collections section is used.
- You can also show/hide Collections in different sections (and on different pages) shown to different User Role Groups (Pro and Enterprise editions)
- Collections are sorted alphabetically in the Admin area. In the Portal you can change the sort order by moving them up or down the stack of Collections in an Collections section of a CMS page (Pro and Enterprise editions).
- You can configure Collections to appear as centered and scrollable circular buttons or as a larger grid of rectangular images. These can be further styled with CSS in your Theme file (Pro and Enterprise editions).
Tips
- Use Collections to mirror how your users think about your brand — by campaign, by market, by asset type.
- Setup Filters (Settings > Filters) first to reflect how you and your users categorize your content, then use those same Filters for your Collection Search Queries.
- Collections are generally visible to all Roles but Assets inside them are subject to User Role visibility settings.
- Collections can be shown to specific User Roles via Personalisation (Pro and Enterprise plans)